环境准备
-
下载Hugo
-
将 Hugo 解压路径添加至系统 PATH

搭建博客
创建站点
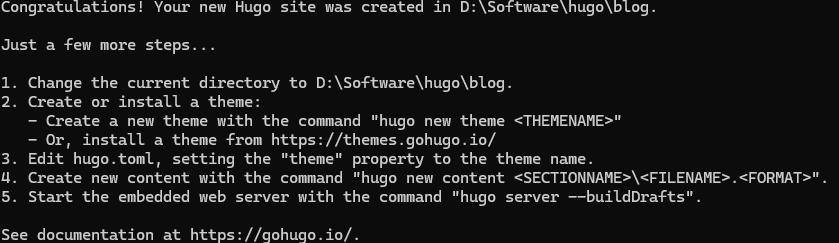
hugo目录下打开命令行,输入hugo new site blog,新建一个存放网站文件的文件夹,成功后出现提示
主题配置
-
可以在Hugo Themes找到喜欢的主题,我用的是stack,下载后解压到
blog\themes目录里 -
在主题文件夹中找到
exampleSite文件夹,复制其中content和hugo.yaml到blog文件夹下,并删除原本的配置文件hugo.toml -
修改
themes文件夹下主题文件名,删除文件名中的版本号,使其和hugo.yaml中的主题名一样 -
删除
content>post>rich-content文件夹,因为文件内容引用了youtube视频,不删掉可能网络访问失败启动不了 -
此时网站框架完成,输入
hugo server --buildDrafts命令启动服务,打开输出的地址,如http://localhost:1313/,就可以看到网站的框架了
主要文件夹
| 文件夹 | 功能描述 |
|---|---|
assets |
放置图标、JS 脚本、CSS 样式等资源 |
content |
存放文章与页面,如博客、分类、归档等 |
layouts |
页面结构与布局模板 |
public |
Hugo 编译输出目录,不建议手动修改 |
static |
静态文件,如图片等,会直接映射到根路径 |
themes |
主题文件夹 |
content文件夹中:
categories是分类页面目录page是归档、友链、关于等页面的目录post是存放博客文件的目录
新建文章
blog\content\post文件夹用来存放文章
-
命令行输入
hugo new content post/myfirstblog/index.md -
md文件名的后缀是语言编码,如
index.en.md在英文环境,index.zh-cn在中文环境,默认使用index.md即可
基本参数设置
注:改动参数时要在
:后面加一个空格,否则会报错
外观设置
修改hugo.yaml文件,主要参数如下:
|
|
DefaultContentLanguage: 默认语言
hasCJKLanguage: 设置为true
|
|
pagination: pagerSize: 5:每页文章数
|
|
注:头像和简介改完如果没有变化,输入
hugo --gc清理一下缓存再重新启动服务
|
|
主页Archives,Search,Links显示英文解决方法:hugo\blog\content\page文件夹中对应名称的文件夹,打开其中的index.md,修改成中文标题
社交账号
可以自己增加平台账号,图标从Tabler Icons下载svg格式
在\hugo\blog\assets目录下创建icons文件夹,放入图标,然后修改hugo.yaml文件这一部分
|
|
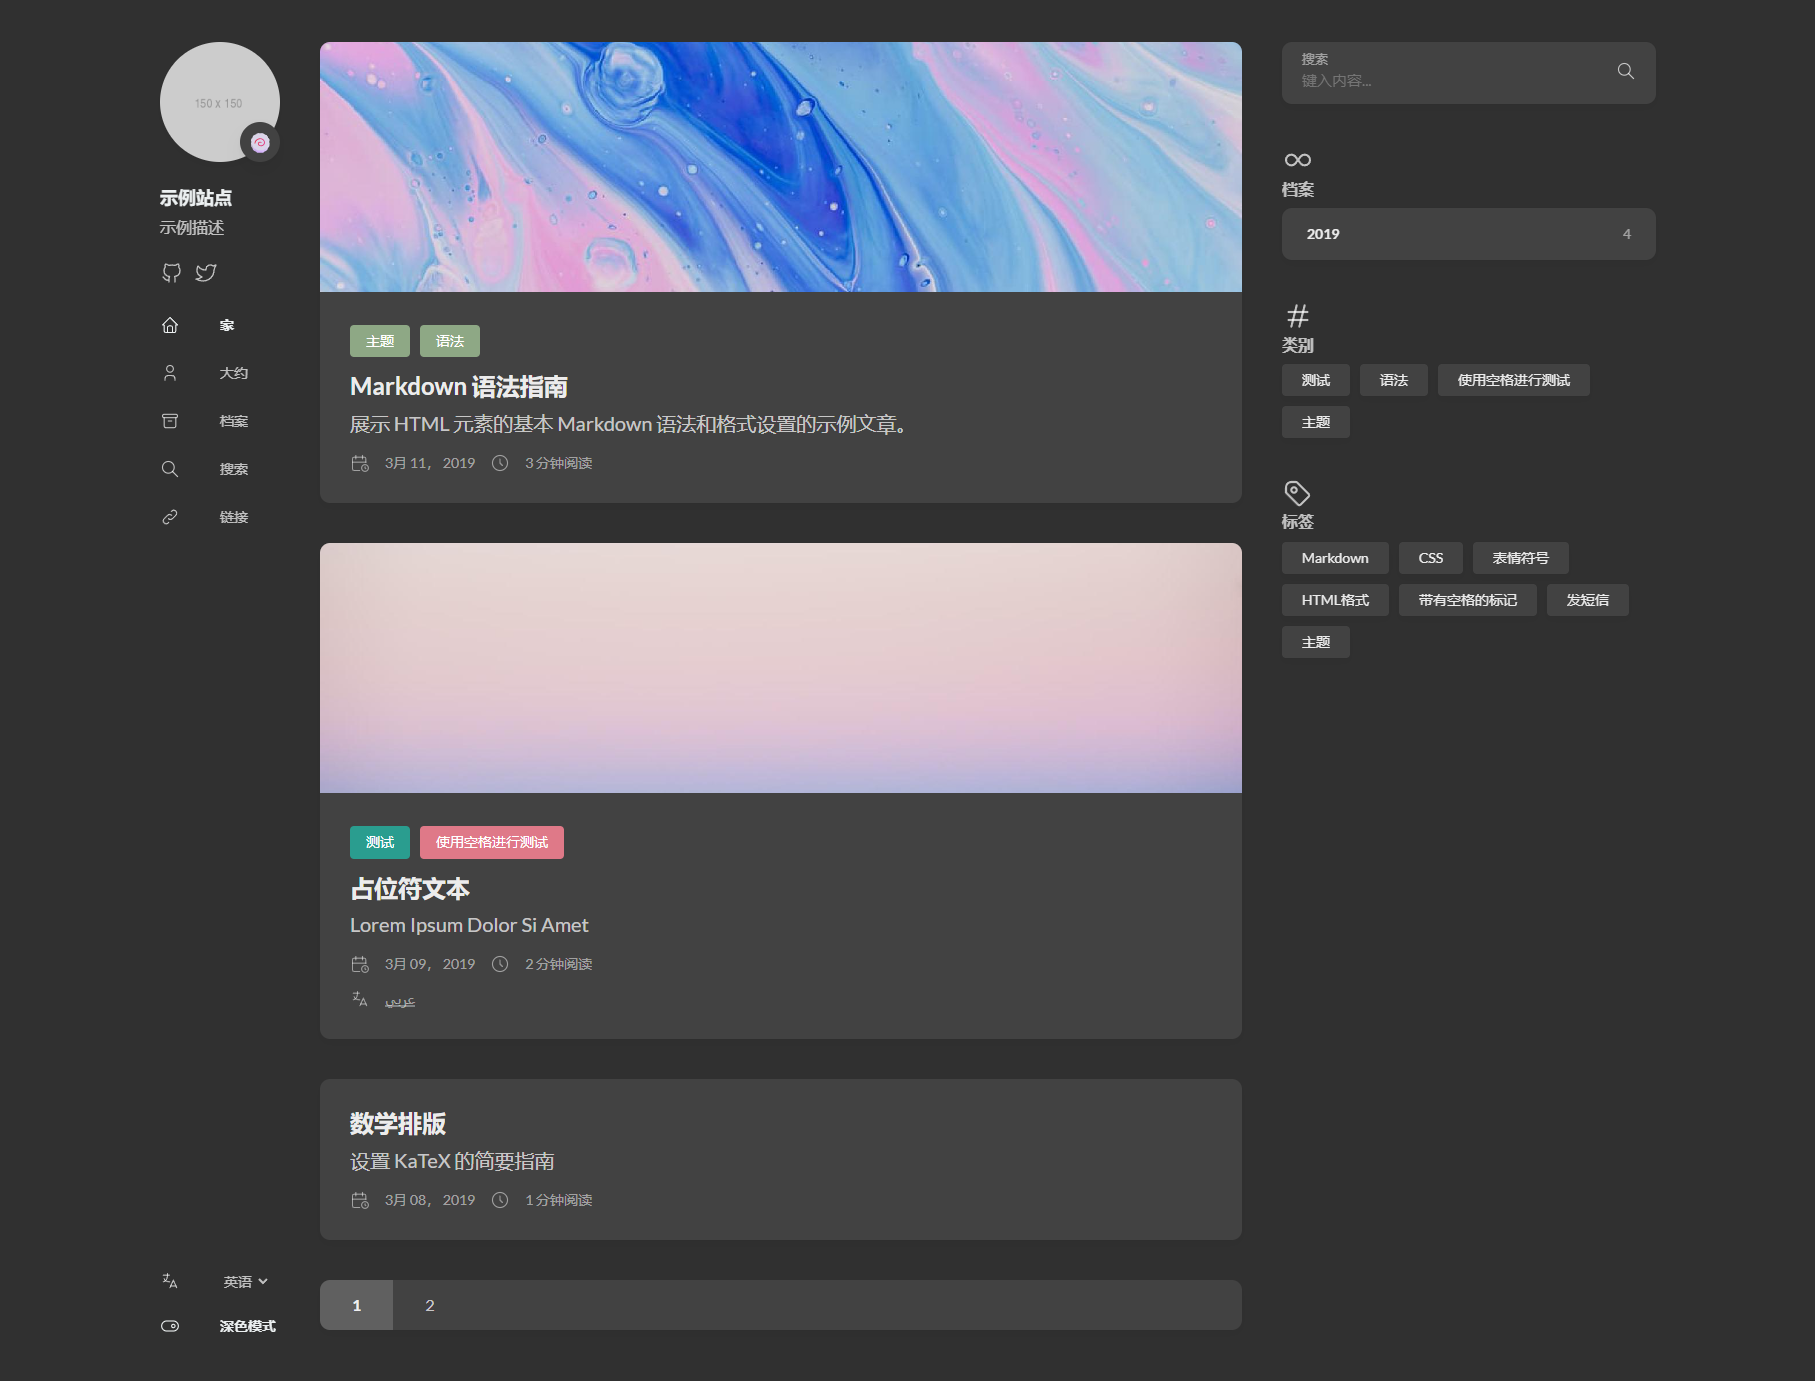
到这里本地的设置和调试基本完成了,网站现在是这样: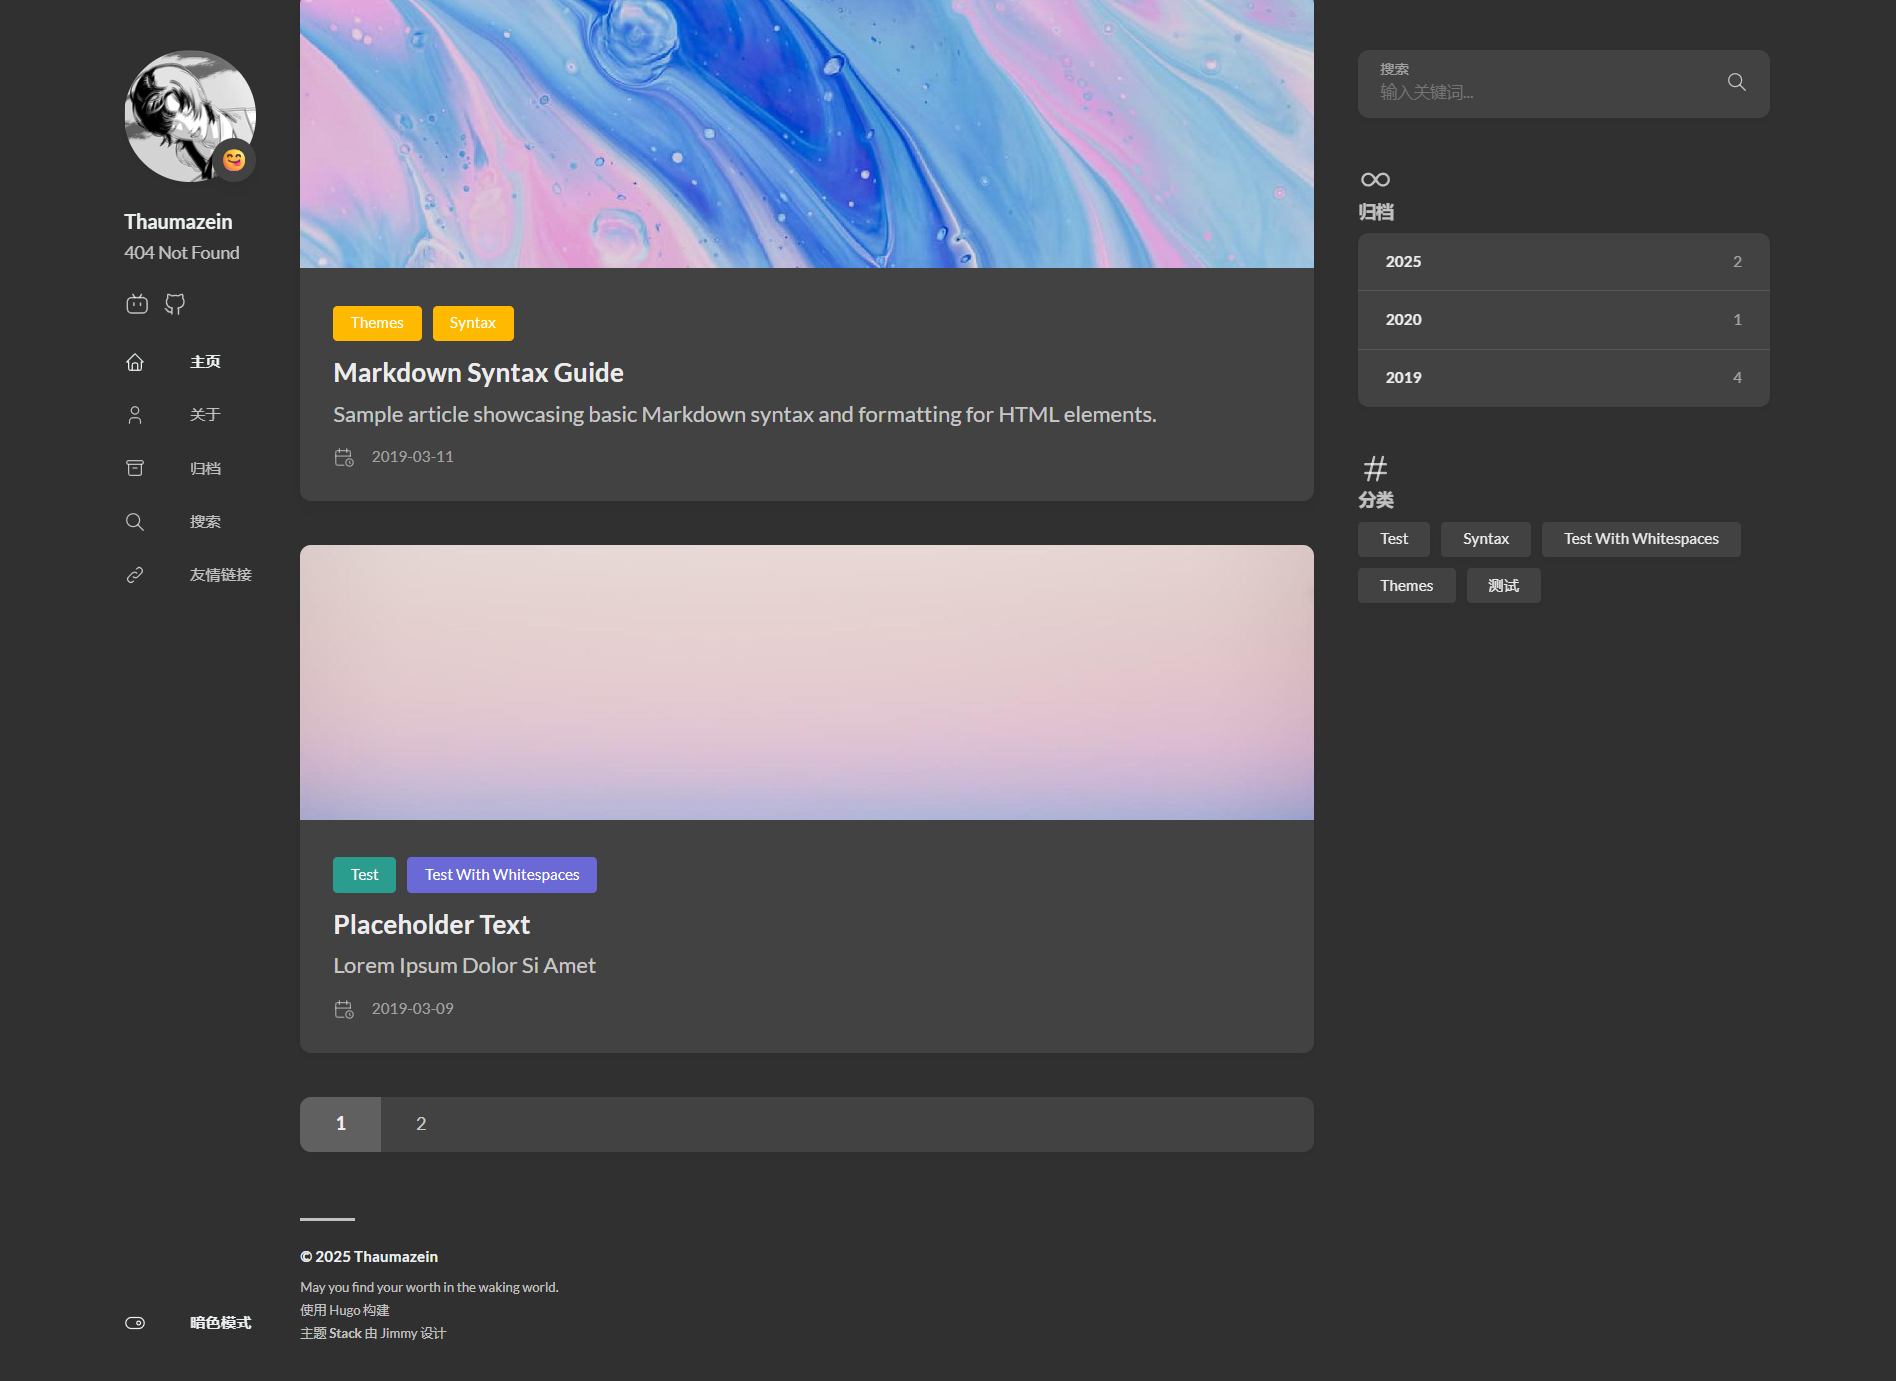
部署到GitHub
手动部署
github新建一个公有仓库,命名建议github用户名.github.io

修改hugo.yaml文件baseurl参数为https://用户名.github.io/
我们需要把public文件夹下的文件上传,因此在此文件夹下打开命令行,然后依次输入下列命令
|
|
仓库界面进入settings>pages>branch选择main,保存,刷新后出现自己网站的url,部署成功

GitHub Action实现自动化部署
github新建一个仓库用来存放hugo主文件,建议设置成私有
由于自动生成的文件比如public不需要上传,因此在\hugo\blog文件夹新建一个.gitignore文件来忽略上传,文件中写入
|
|
打开命令行,然后依次输入下列命令
|
|
在Personal Access Tokens (Classic)新建一个token,设置如下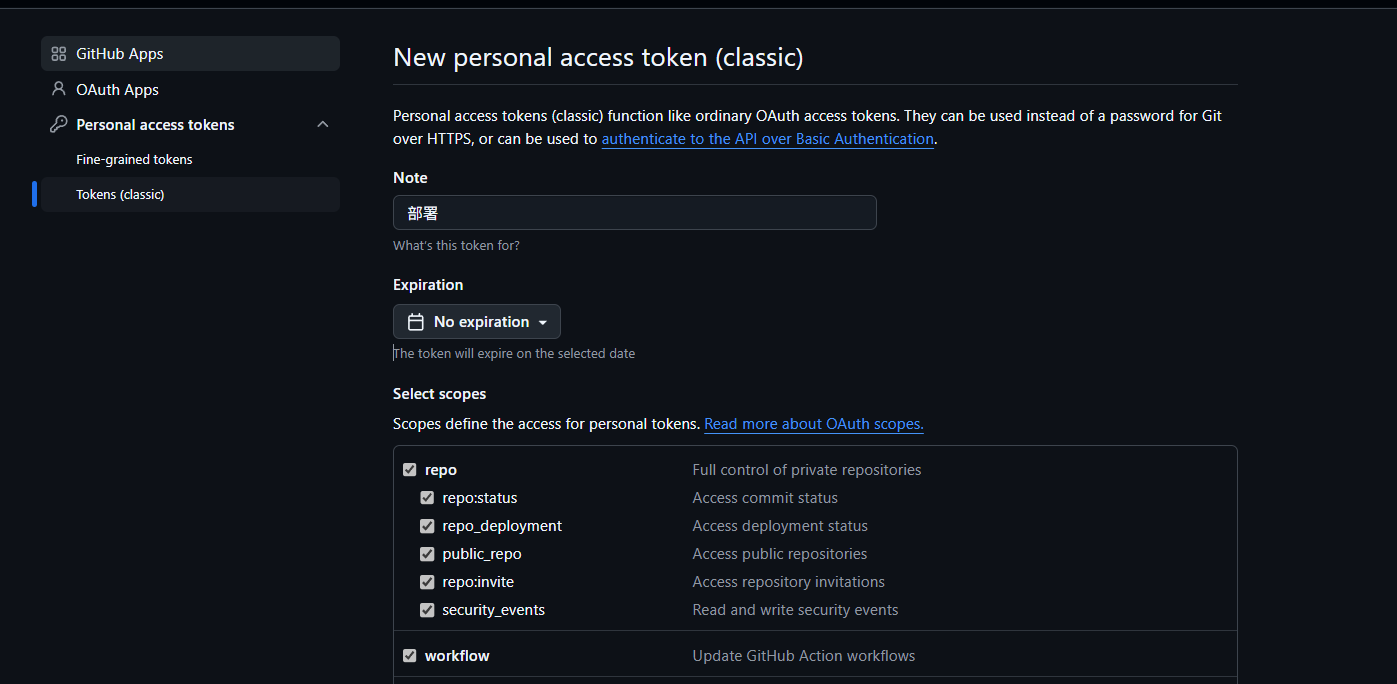
进入存放hugo主文件的仓库,选择Settings> Secrets and variables> Actions>Repository secrets新增环境变量,填入token
在\hugo\blog文件夹下新建.github\workflows\xxxx.yaml文件,复制下面的代码到文件,并把参数改成自己的
|
|
把文件push上去
|
|
仓库中显示运行成功,部署完成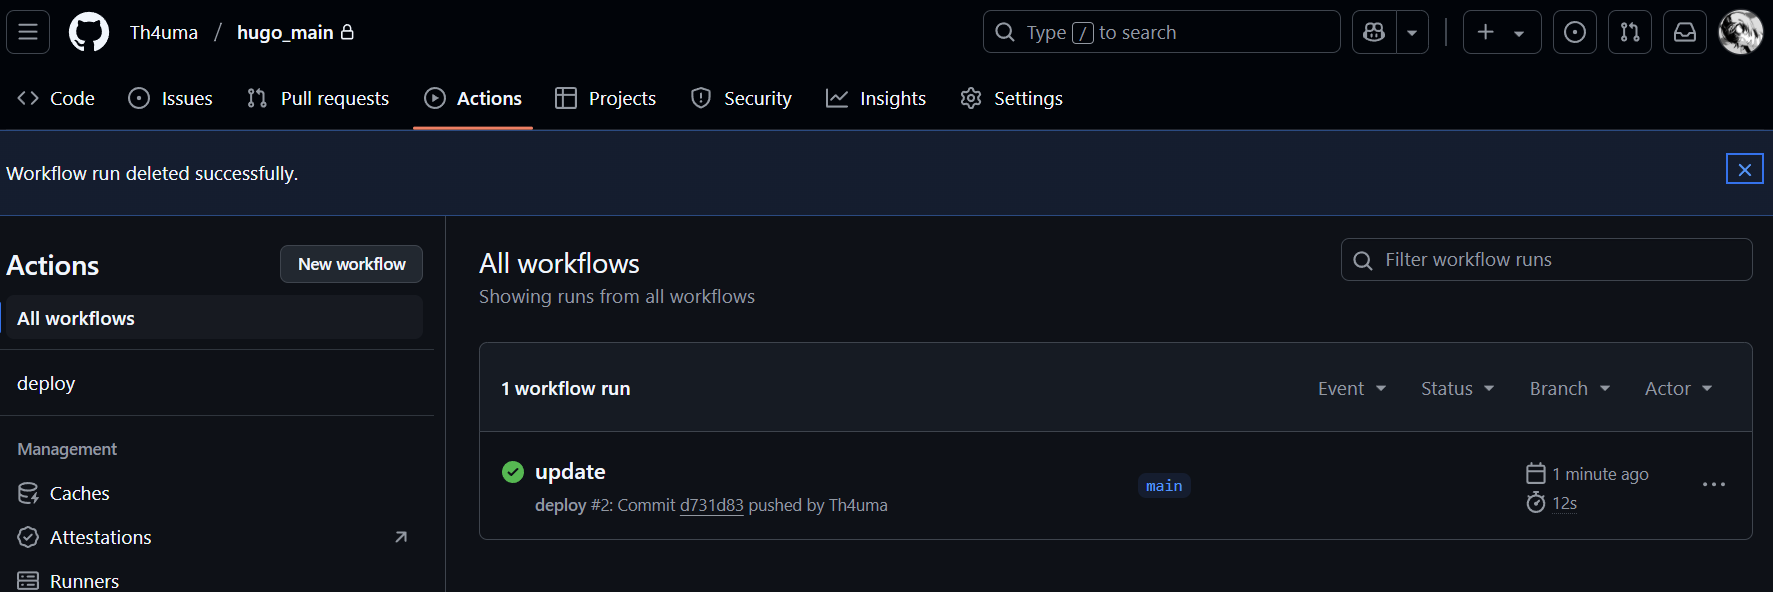
附:图片引用问题
方案一: 文章中的图片引用绝对路径会报错,因此在static文件夹下新建一个images文件夹,把文章中用到的图片放进去,改名使图片名中不含空格。在文章中加入下面的代码来引用
|
|
方案二(推荐 ): 将每篇文章的图片都放在content>post>文章文件夹,和index.md放在一起,用下面的代码进行引用,这样更整洁,也方便管理。只有封面图放在image文件夹,方便查找和更换
|
|
重要: GitHub Pages 是 Linux 环境,区分大小写,而Windows默认不区分。如果图片用了大写的后缀,本地可以正常加载但push后不行
如果已经 push 过大写文件名,单纯改大小写不会被 Git 识别,需要使用 git mv 刷新。解决方法就是将图片后缀都改成小写,然后在当前博客项目目录执行
|
|
然后重新push一遍,更新仓库内的图片名,这个很难排查的问题就解决了